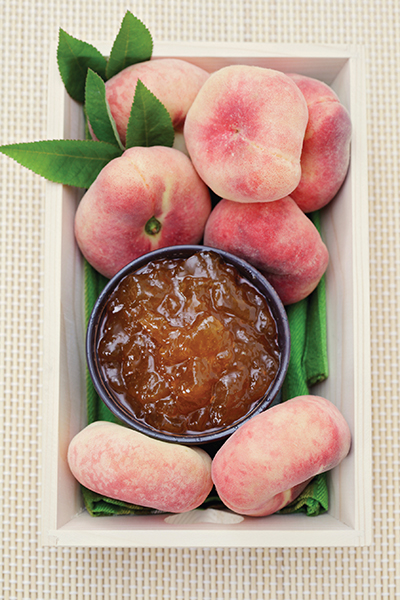
Peach Bliss
by Anna Herman
Gorge though you may, there are only so many peaches and cherries you can eat this summer, and some fruits are just better when they aren’t fresh: I’ve rarely had an apricot on the East Coast that was worth eating when I bought it. But sweet and tart jam made from local apricots on toast or over vanilla ice cream? I’ll have that anytime. Most summer fruits are as good or better preserved in some fashion and eaten later.
While setting aside time each summer to transform large quantities of perfectly ripe fruit into dozens of jars of jam is a noble project, I prefer to put up small batches of whatever fruit is ripe and ready each week of summer. Sometimes that means freezing whole berries, or submerging cherries with a vanilla bean in a jar of brandy. But I never let summer pass by without making several small batches of jam.
At its most basic, jam or fruit preserve is simply fruit cooked with sugar until thickened. After that you can store it frozen or in the fridge; or “hot pack” this jam in clean jars in boiling water. Home canned foods that are high in acidity (sugar, tomatoes and/or vinegar) are fairly straightforward to make. Following the guidelines available on the back of most new boxes of canning jars, all the canning jar websites and numerous other home canning guides is important. Be creative in your ingredient combinations—not in the method by which you attempt to sterilize and preserve foods to store in the pantry.
Peaches are an excellent fruit to put by in various forms. Pack them in a clean jar and pour brandy to fill (a bit of sugar and vanilla bean optional). These will last for months. But for a treat more suited for breakfast (and children), transform these luscious globes of juicy sweetness into chunky spreadable peach preserves.
Do-It-Yourself Peach Preserves
Reuse or buy new glass jars, and even reuse the bands that hold the two-part lid on. But always use brand new flat metal lids if you are heat processing, to ensure a safe seal.
Wash jars and bands in hot, soapy water. Rinse. Place jars inside a canner or stock pot filled with water and bring to boil. Boil jars for 15 minutes to sterilize. Or, run jars through the sanitizing cycle of your dishwasher. Place lids and bands in the warm water (or dishwasher) until ready to use (do not boil).
Directions
• Have a large pot of water on hand at a simmer.
• Make an “x” with a sharp knife at the bottom of each peach and plunge several peaches at a time into hot water for about 15 seconds. Remove with slotted spoon into a bowl of cold water.
• Remove from water to a clean cutting board and use a paring knife to easily pull off the peel. Cut the peach flesh off of the pit, and over a bowl slice the peach into small chunks, catching all the juice.
• Add the juice of a half lemon to every 4 or 5 peaches. For every pound of peaches add about 1/2 cup of sugar.
• Stir and let sit for at least an hour to let the juices flow. Meanwhile you can get your jars ready.
• Strain the sugary juices of the peaches into a heavy-bottom saucepan and bring to a boil over high heat. Turn heat to medium and simmer until the liquid is reduced by a bit more than half.
• Add the peach chunks and continue to cook until the jam seems thick. Stir often to prevent scorching. The wider the pan the less time this takes (if you are making a small batch you can use a high-sided sauté pan).
• Put a small amount of thickened fruit on a cool plate. If liquid dribbles from the jam, continue cooking a bit longer. Taste along the way and adjust sweetness with a bit more sugar or a bit more lemon juice.
• When thick enough, ladle into hot jars, leaving a 1/4 inch of headspace. Remove air bubbles by slipping a clean wooden chopstick or rubber spatula inside along the edge of the jar, wipe the rim, add the lid and band and loosely tighten the band.
• Place jars in boiling water bath (water must cover the jars by at least 2 inches) for 10 minutes(or according to the time for your altitude). Remove from water with tongs and place on clean, dry surface for 12 to 24 hours to cool.
• Check the seal. The lid should be slightly concave and have no give when pressed in the center with your finger. Label and date your jam, and if you aren’t going to eat it immediately, you can store it for up to a year.
Anna Herman is a garden educator who raises chickens, ducks, bees, fruits and veggies in her Mount Airy backyard.


